ctrl + curate

your shortcut to a thoughtfully curated life

  • DIYs
      • Entertaining
      • Hacks
      • Home Decor
      • Plants
      • Recipes
      • View All
          • 5 Min Hanging Nursery Planter Makeover
          • Quick and Easy DIY Rope Wall Hanging
          • DIY Faux Marble Paper Mache Chain Decor
  • Life
      • Hacks
      • Life Lately
      • Reviews
      • Kids
      • Sustainable Living
      • View All
          • Our Japan Summer Honeymoon, Intro
          • Curly Hair Updo: French Twist & Crown
          • Everything We DIY’ed for our Modern Beach Wedding
  • Home
      • Home DIYs
      • Hailey Home
      • Holidays
      • Home Decor
      • Moodboards
      • Renter Friendly
      • View All
          • DIY Faux White Oak Floating Shelf Method + Brackets
          • My Work From Home Essentials for a Productive Space
          • DIY No Sew Lumbar Pillow
  • Style
      • Accessories
      • Curly Hairstyles
      • DIYs
      • Nail Art
      • Outfits
      • View All
          • The Closet Staple Vital for Surviving A Florida Summer
          • A Simple Summer DIY Purse Makeover
          • Beaded Grown Up Friendship Bracelets
  • Finds
      • Gift Guides
      • Roundups
      • Favorite Finds
      • View All
          • Floating Frame Finds for a Unique Display
          • 11 Large, Neutral Area Rugs under $400
          • Aesthetic Storage Baskets for BILLY Bookcase Shelves

Beginner Friendly -  DIYs -  Puppy Friendly

DIY All Natural Rope Toy for your Precious Pup

DIY Rope Dog Toy

As a first time puppy mom, I got a little carried away buying toys for Hunter. Plushies with squeakers? Check. Classic Kong? Check. Puzzle balls? Check. But after paying $10 for a glorified rope and fuzzy tennis ball that shed into a million tiny choking hazards from a pet store, I became a lot more skeptical that buying toys was the way to go.

DIY Rope Dog Toy   DIY Rope Dog Toyxz

And with several rope and knot tying projects already under the belt, I made the rope toy I wish existed. An all natural looped pull toy perfect for tug-o-war that I don’t have to worry about becoming a choking hazard.

Some Pre-Project Notes:

I like tying the toy first before dyeing to see where I want the dye, but if you want an all-over dye look, dye & let dry first. Takes way less time to air dry that way.

I used 1/2″ thick rope for these, but they took so long to air dry I’d recommend a smaller size. The skinnier the rope, the easier to knot as well!

You’ll Need
100% cotton rope 
natural dye (recipe for Pantone 2018 approved Ultra Violet down below)

This toy boils down to two knots: the Matthew Walker & Perfection Loop Knot. Honestly, videos are a million times better at demonstrating knot tying than pictures, and this video for the Matthew Walker and this video for the Perfection Loop will show you the ropes in no time.

DIY Rope Dog Toy

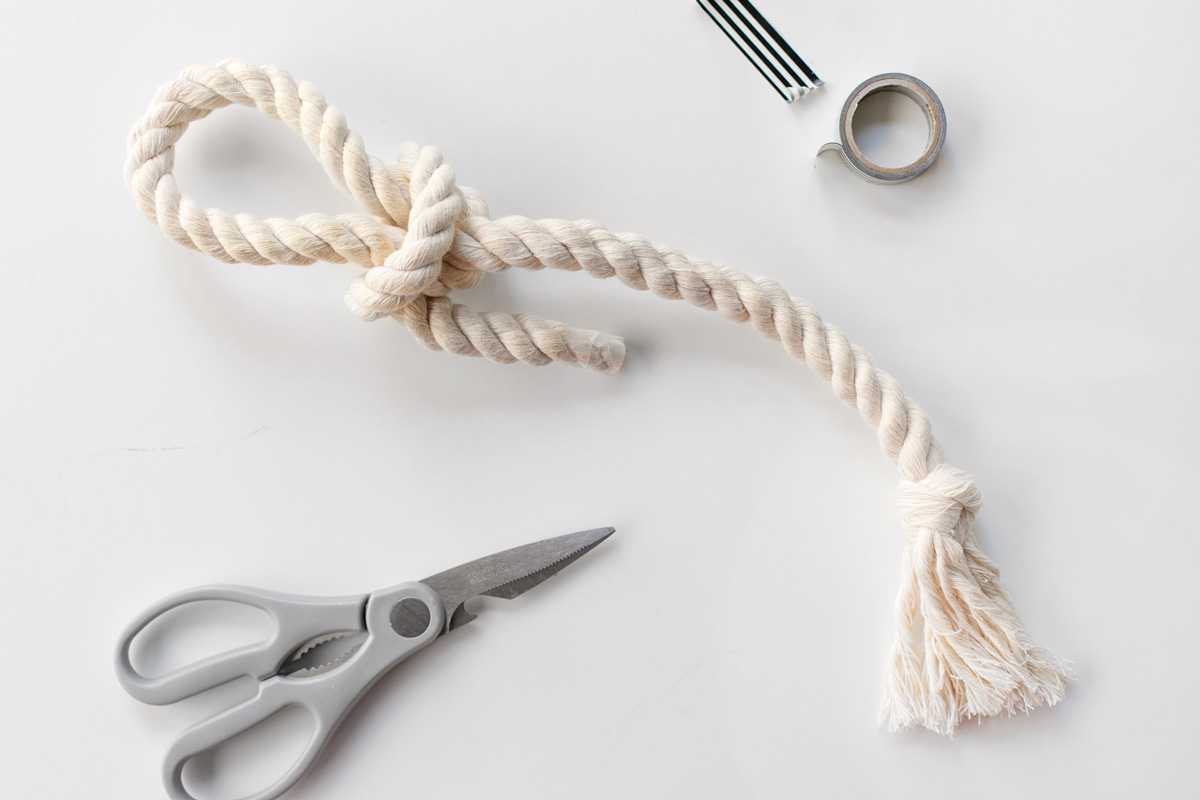
Tape the cut end with washi tape make the Perfection Loop. From there, measure out ~10″ for the Matthew Walker knot + the length you want the middle of the toy to be. Tie the Walker knot to the end.

Wash the rope with mild soap to remove anything that could prevent it from taking on dye. Soak toy in salt water for 1 hour in 1 part salt to 16 parts water solution. This helps the rope retain its color and reinforce the knots. Seriously, try untying the toy after the bath.

While the rope is soaking, make dye.

DIY Rope Dog Toy

Natural Purple Dye

This was my second time experimenting with natural dyes and I am completely in love! I really wanted an ultra violet for Pantone’s 2018 Color of the Year, and everywhere online kept mentioning red cabbage & blueberries. Red cabbage had the most consistent swatches but with more room for controlled variance (like adding vinegar instead of salt will make your purple more pink or baking soda turns it blue!) so here we are!

You’ll Need
1/2 a red cabbage
1 T salt per 1/2 cabbage
enough water to cover the cabbage

DIY Rope Dog Toy

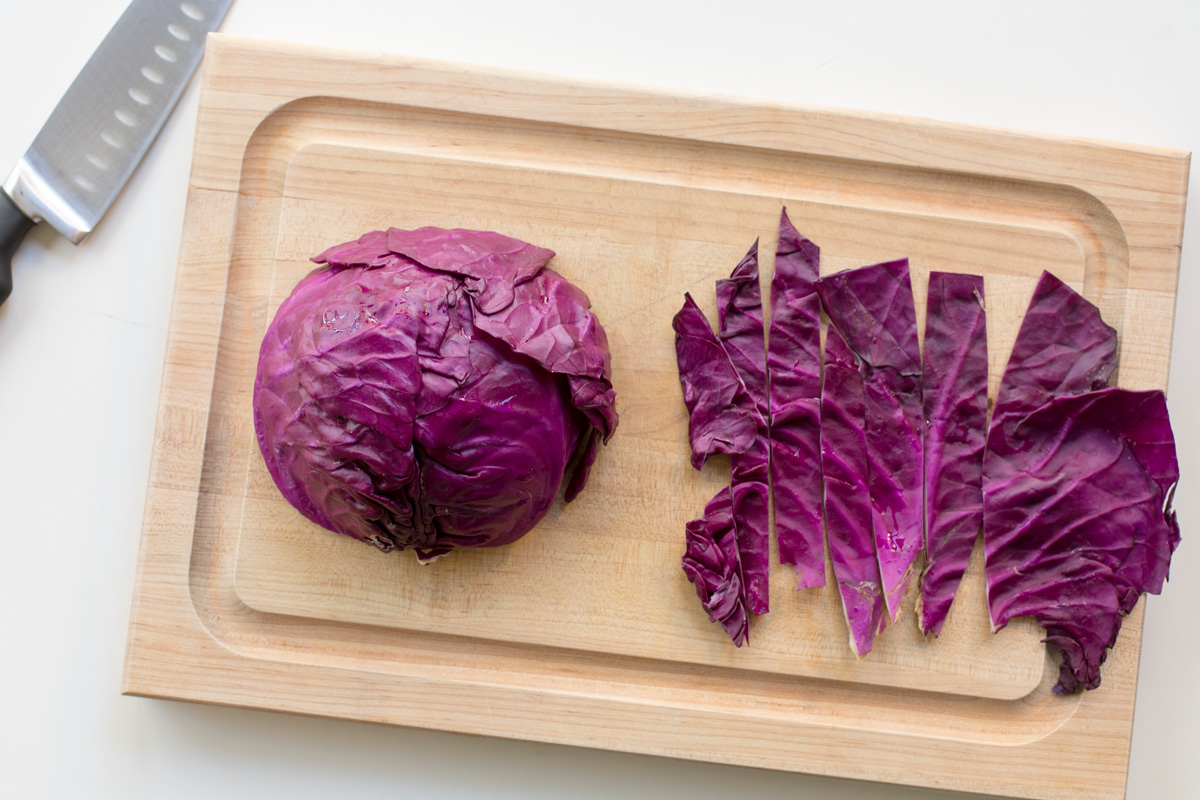
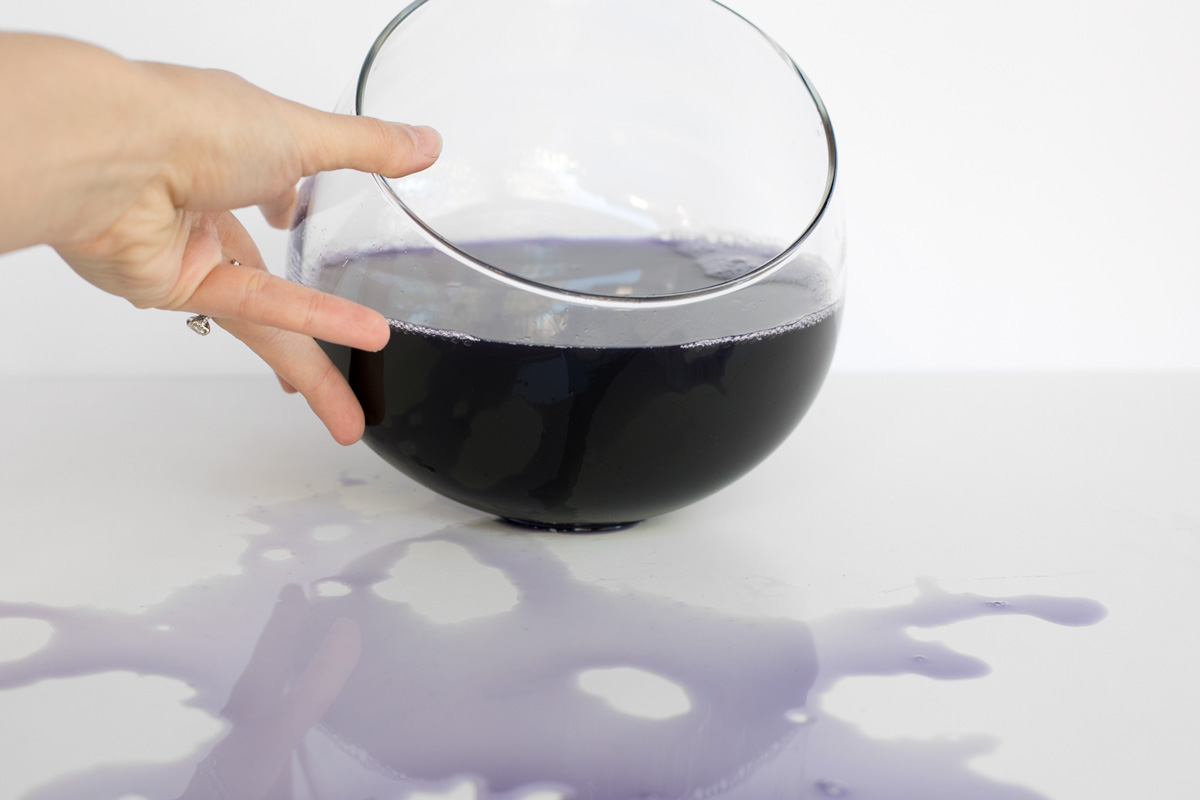
Cut the cabbage leaves roughly into strips and transfer to a stainless steel pot. Make sure the pot is big enough to give you enough dye to completely cover the rope later!

Add the salt, cover with water, and simmer for an hour. Strain out the cabbage leaves.

DIY Rope Dog Toy

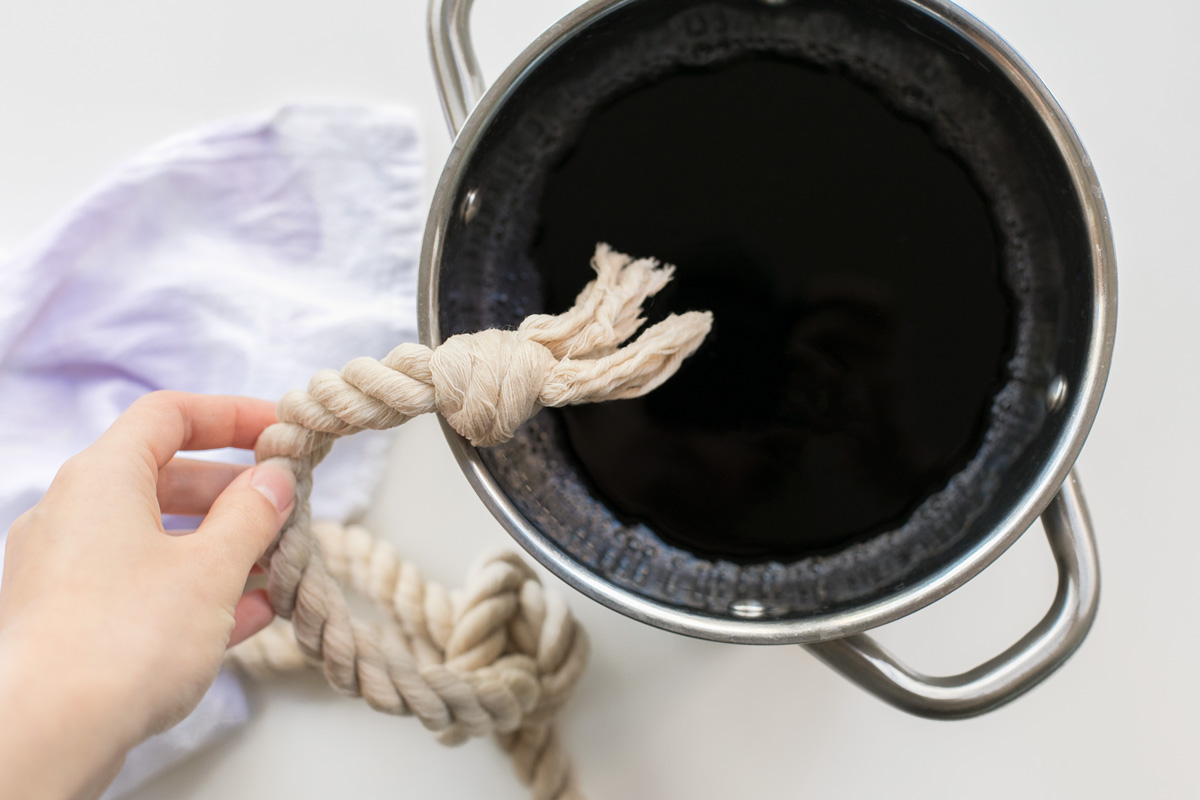
Transfer the rope to the dye bath and simmer until the desired color is achieved. The color will lighten once the rope is dry, so go darker than you think. Air dry before rinsing in cold water.

DIY Rope Dog Toy

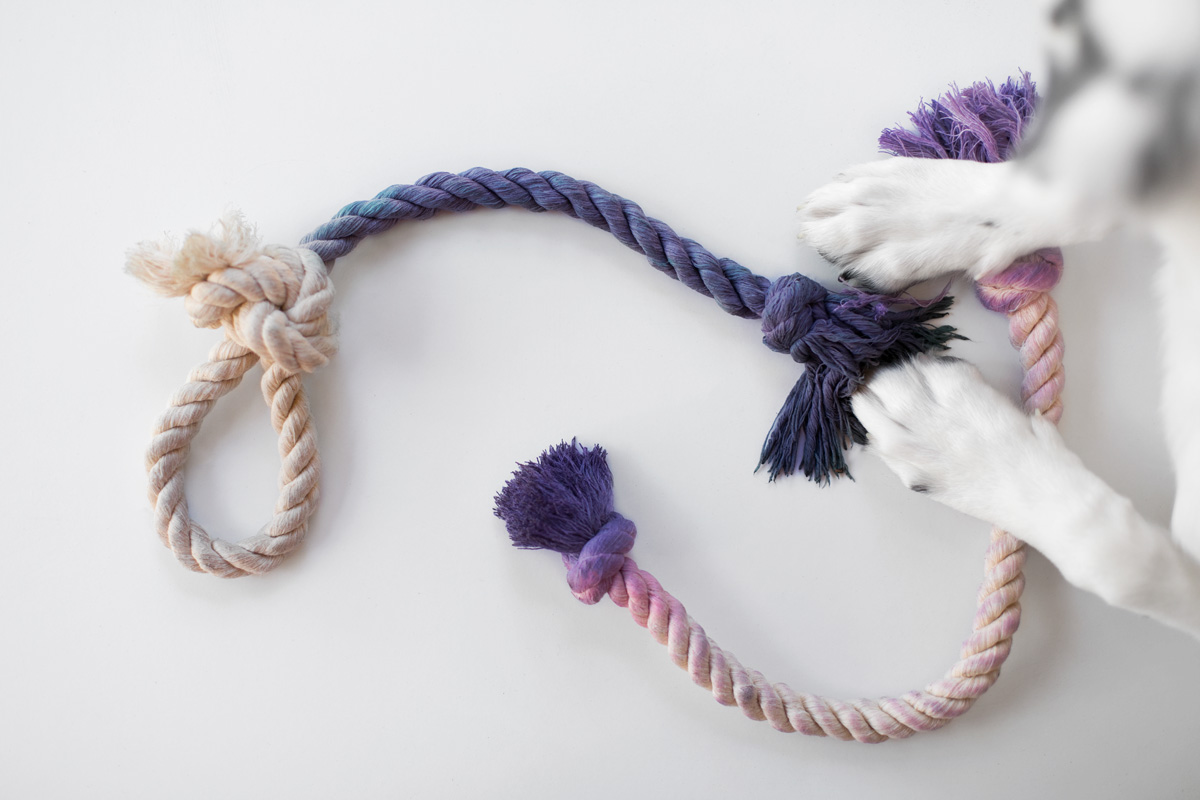
The looped toy was soaked in salt while the basic, and you can slightly see the pink tinge in 2 Walker knots version that was soaked briefly in vinegar. The color difference is more dramatic when fully dry.

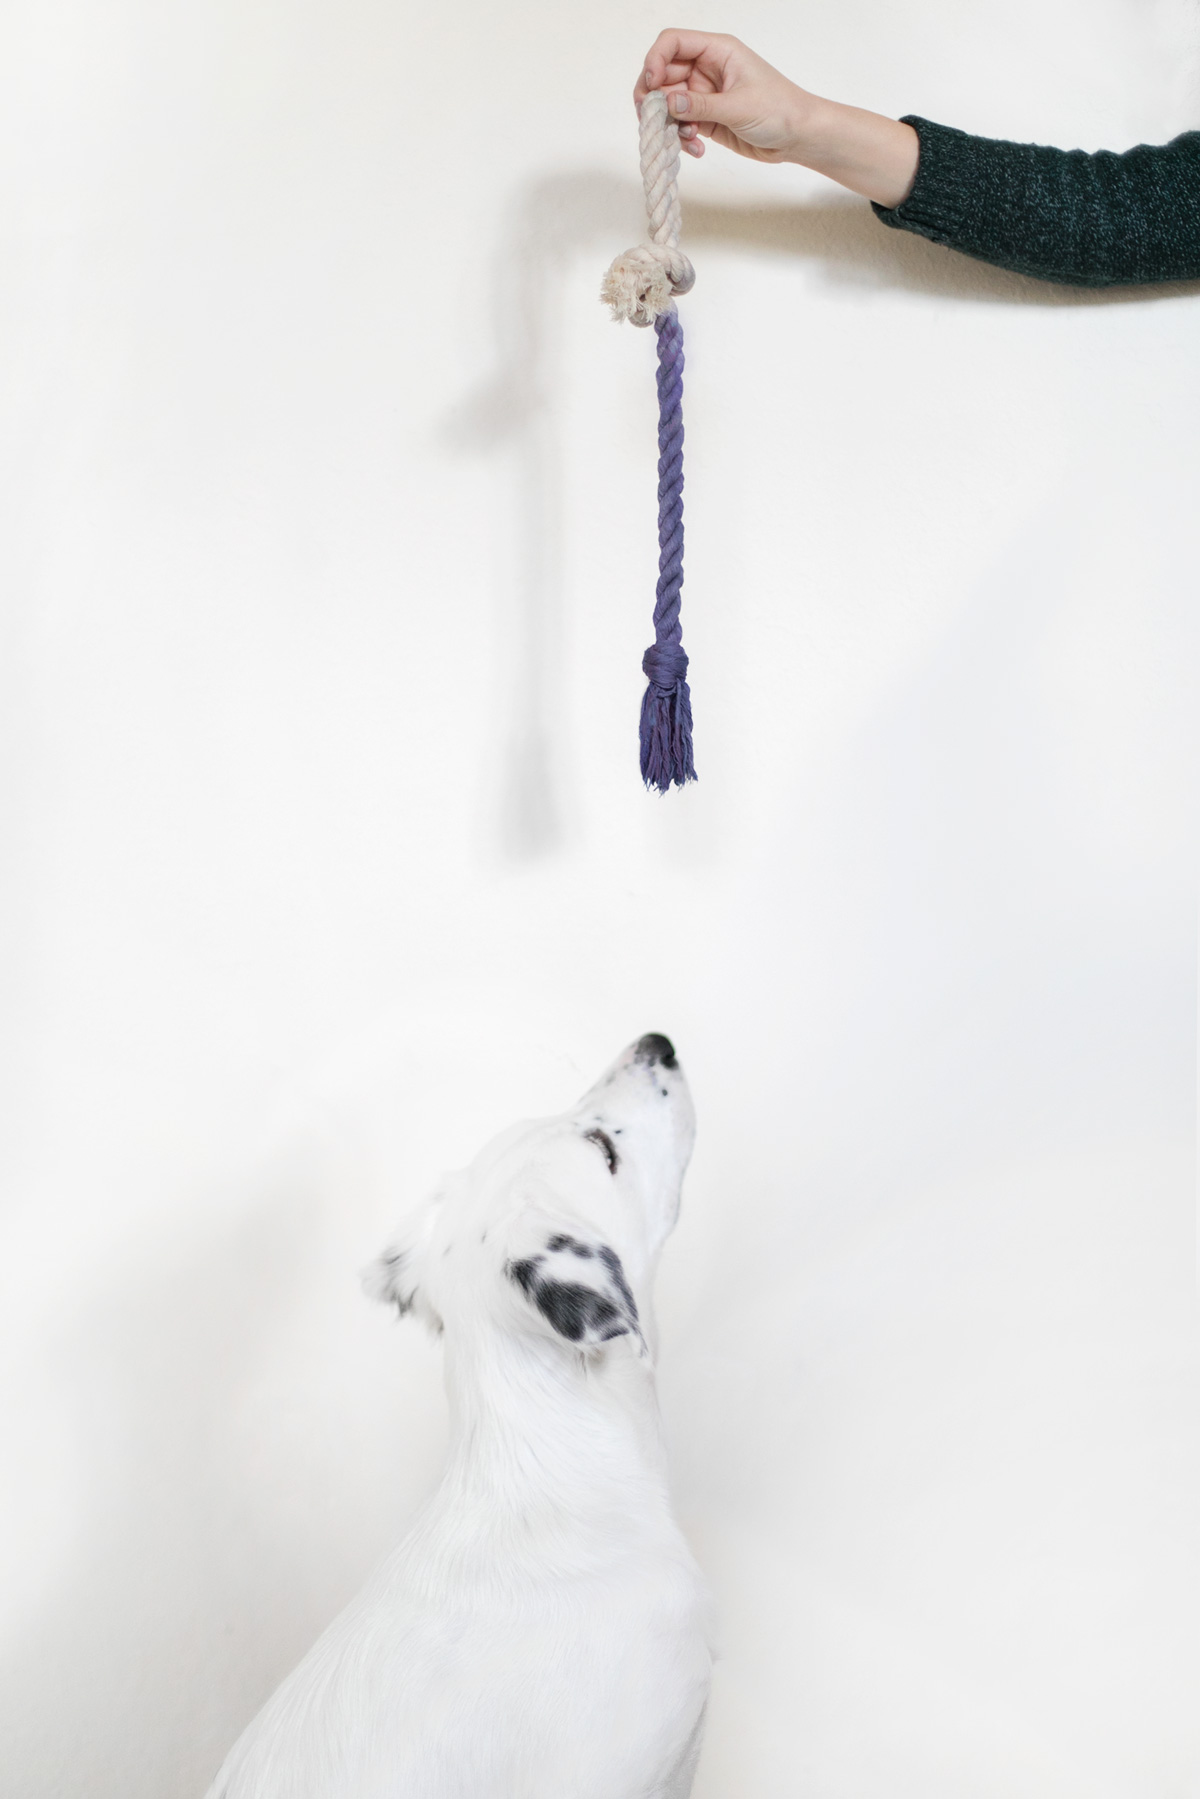
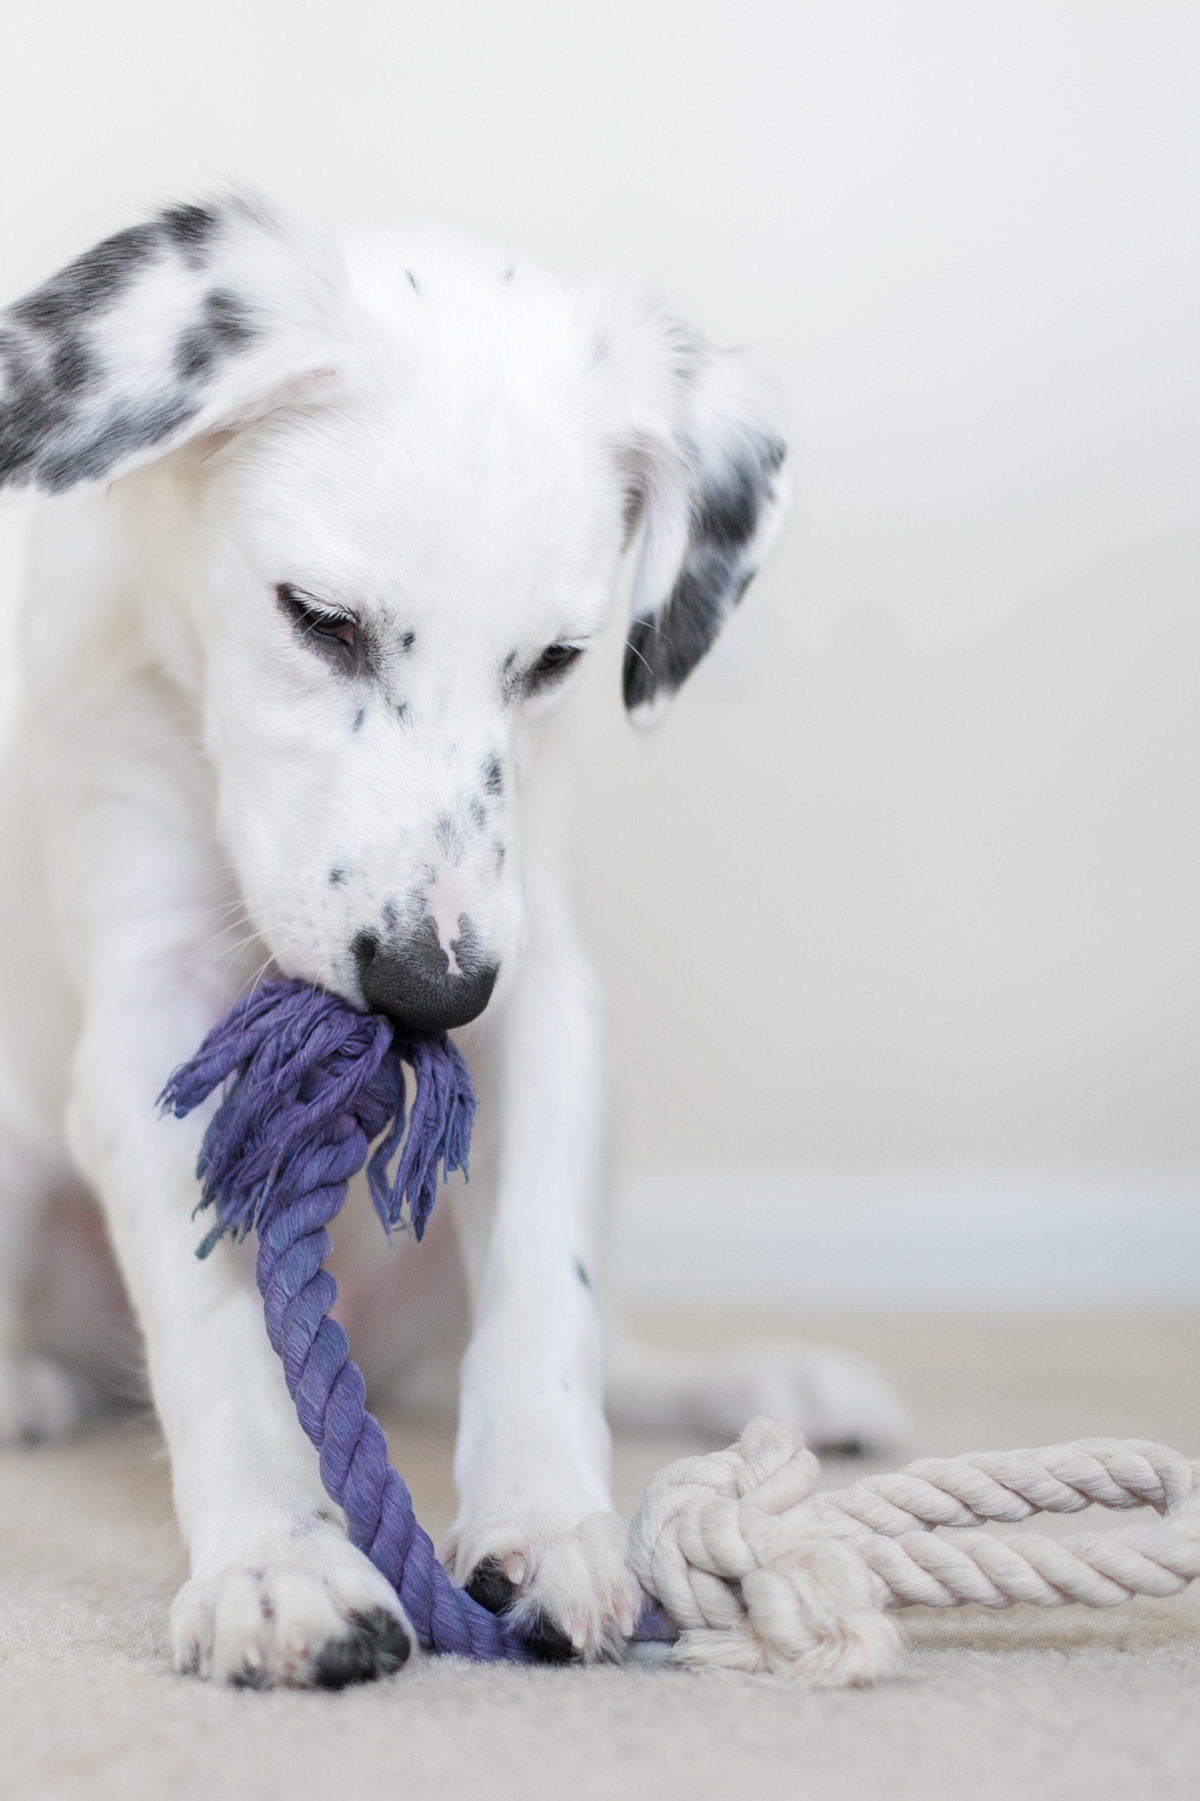
So do they pass the puppy test?

DIY Rope Dog Toy

DIY Rope Dog Toy

DIY Rope Dog Toy

DIY Rope Dog Toy

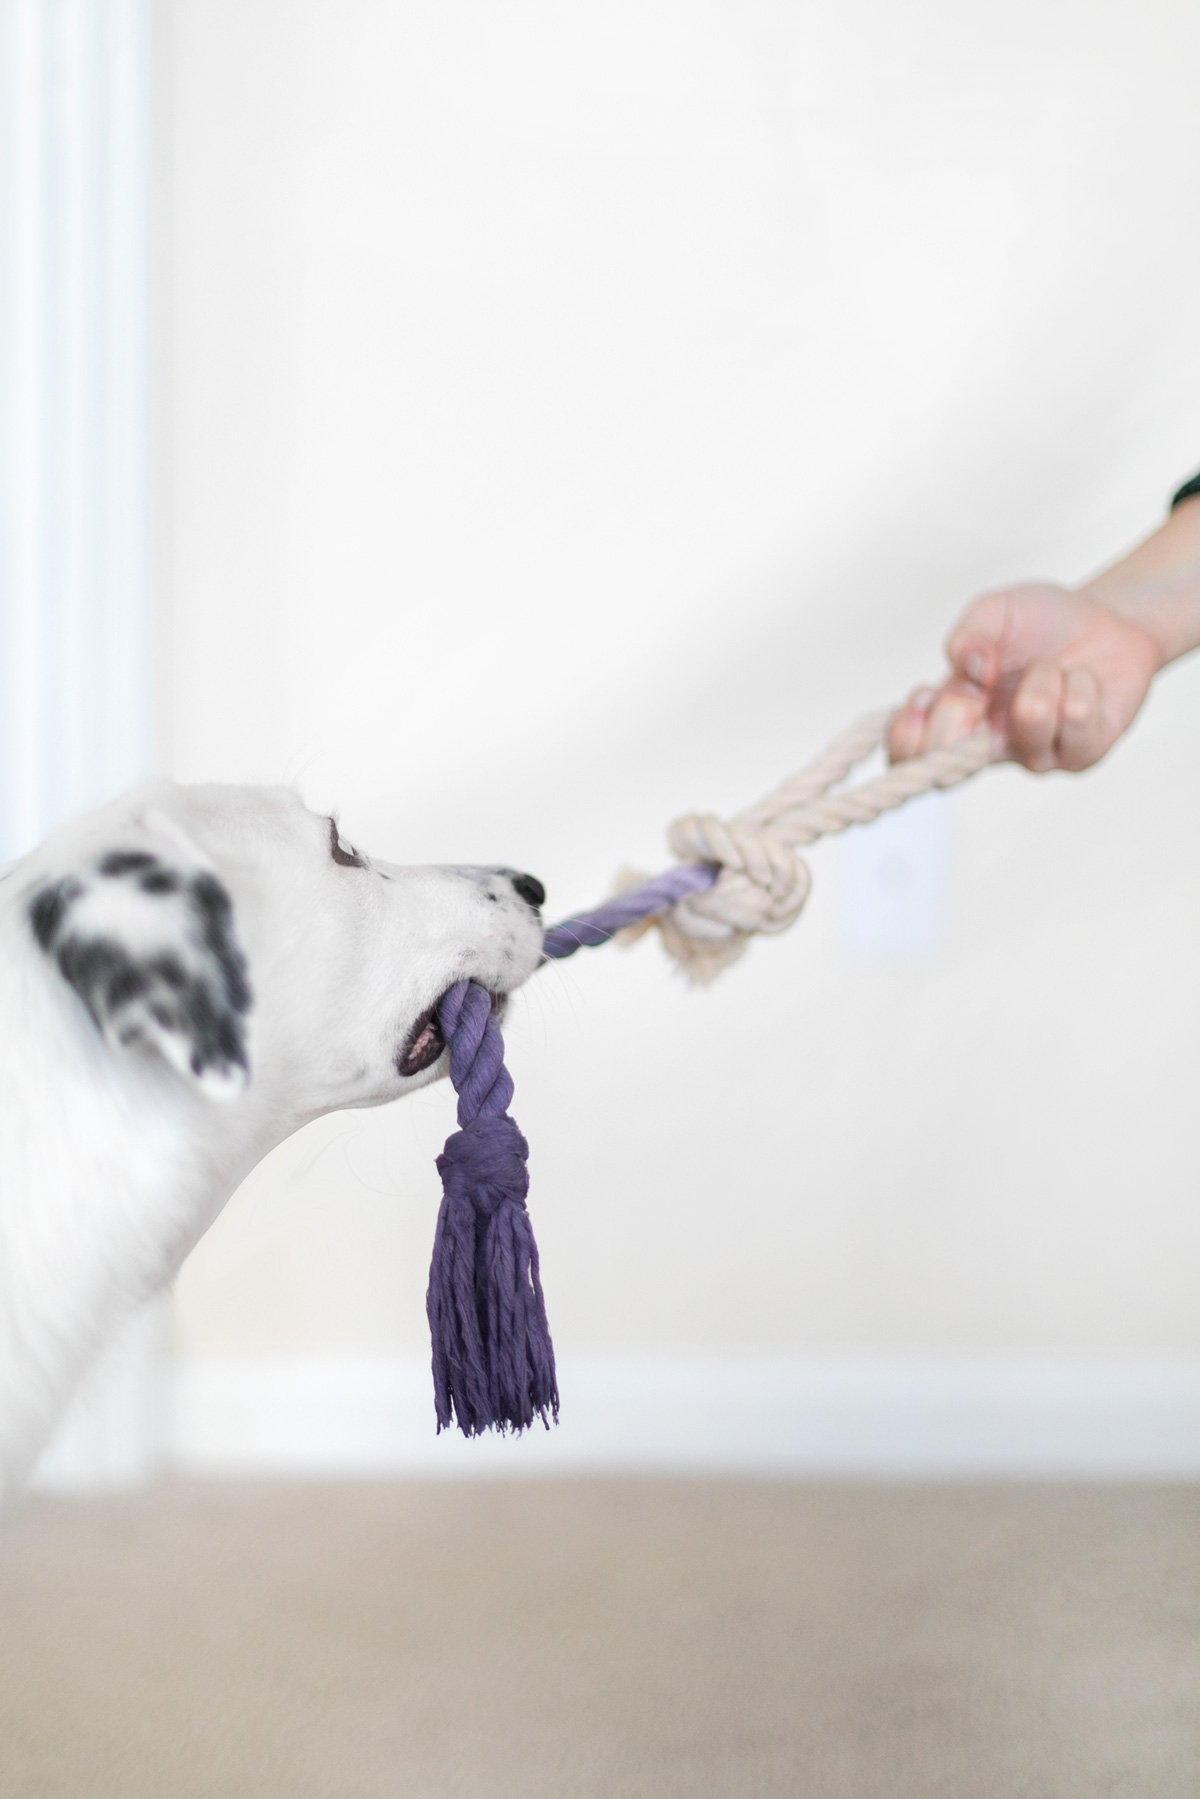
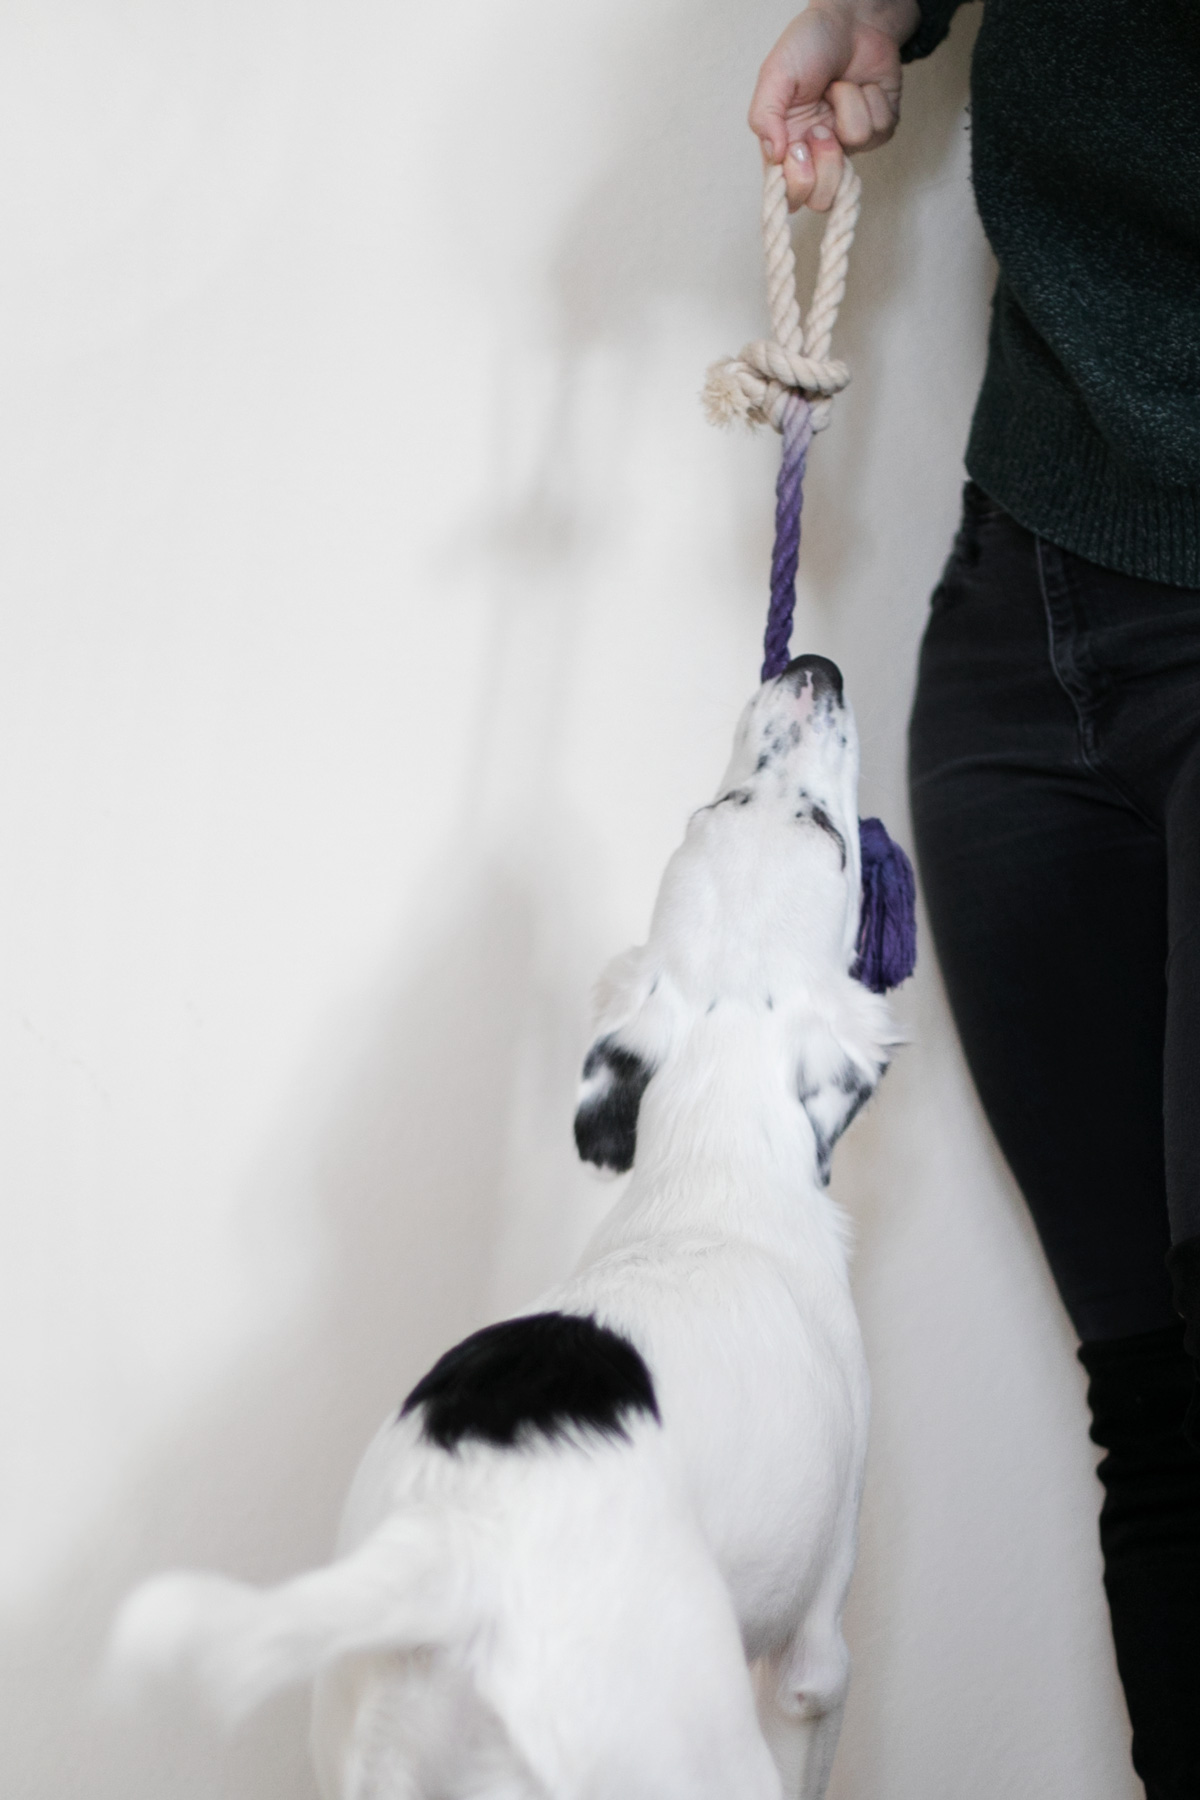
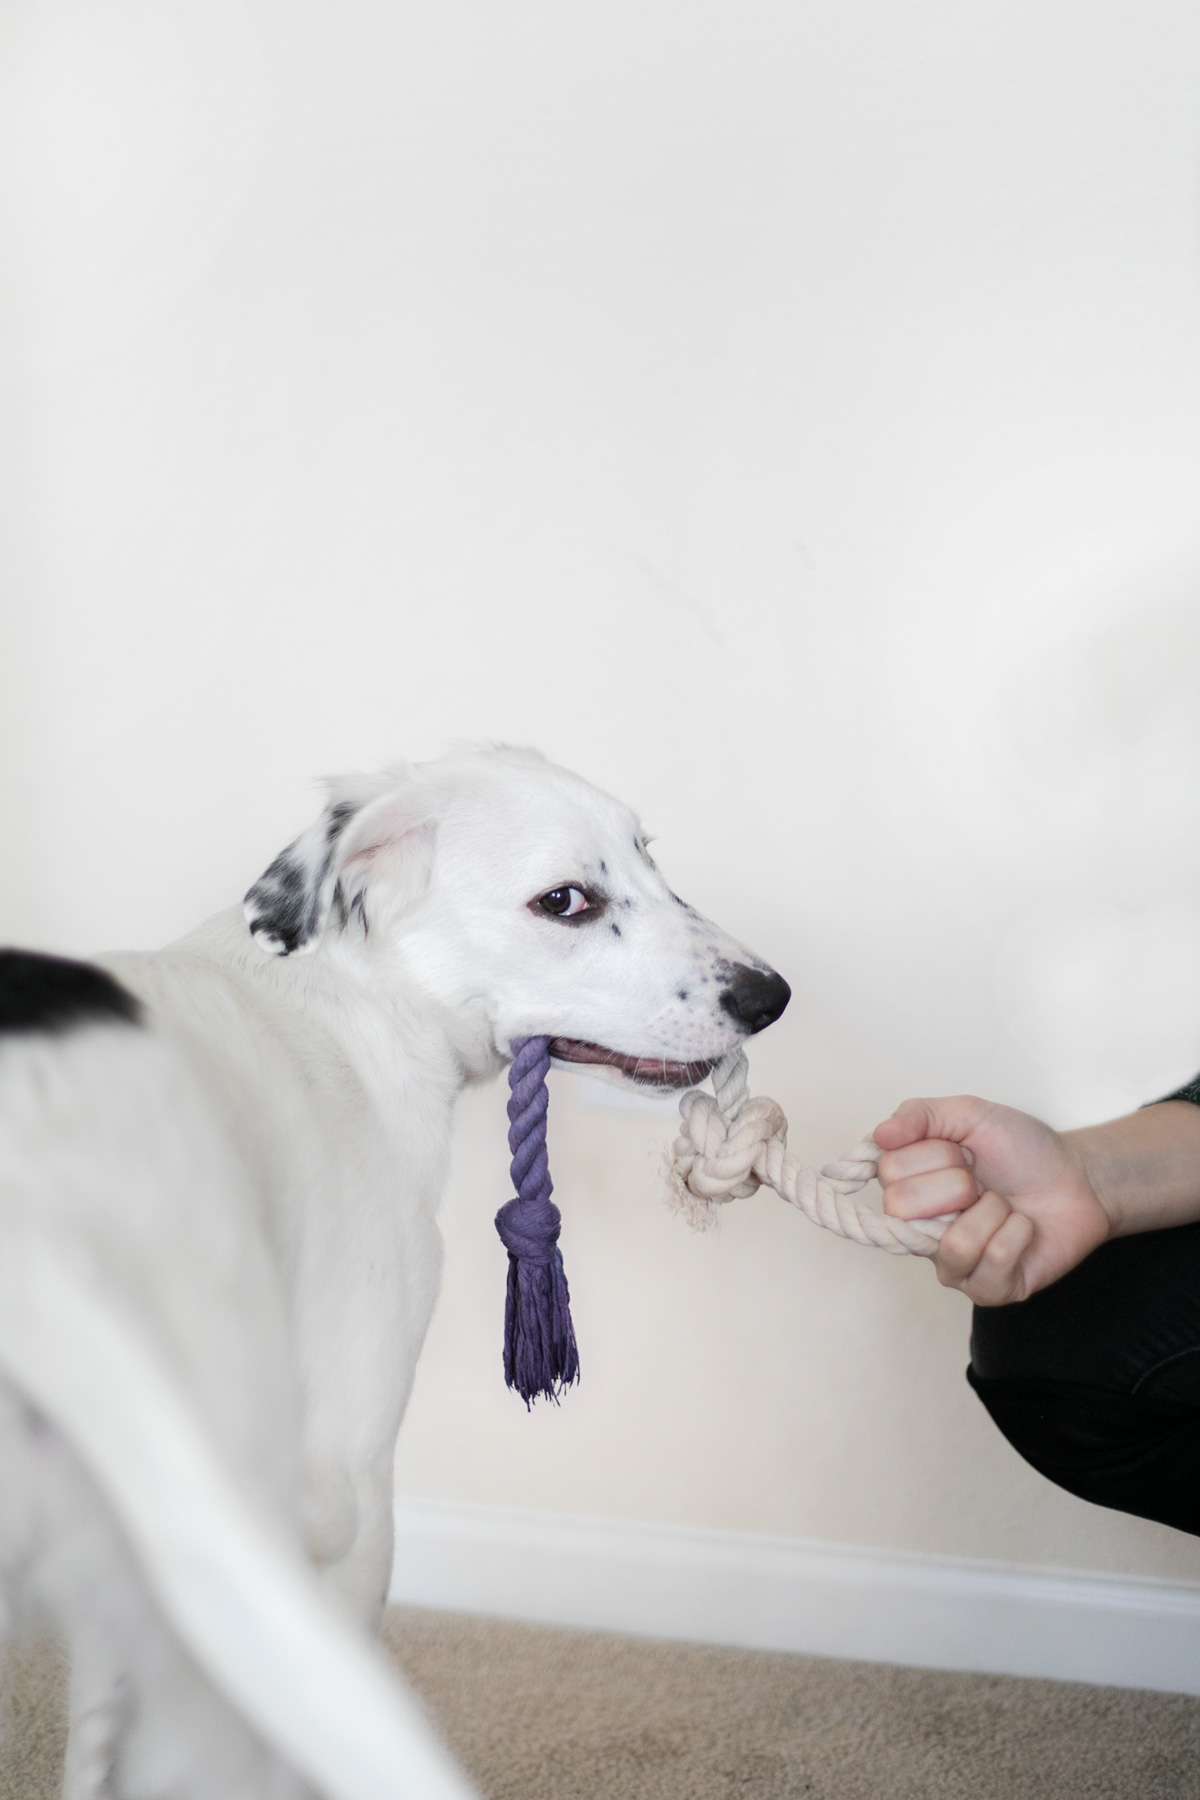
Oh ya. This is the ‘you’re never getting this back’ face. 2 weeks later, the knots have held up extremely well- better than Hunter’s store bought ones. The color has faded dramatically, but I partially blame that on handing the toy over before it was fully dry (again, 1/2″ is wayyy too thick). This has easily become our favorite toy! Are there any other dog DIYs you’d want to see? Let me know!

  • Tweet
  • Facebook
  • Pin
  • Comment

Related Posts

  • diy puppy pool party A DIY Puppy Pool Party for Hunter’s First Birthday

1 Comment

  1. Vivi Kim says

    December 8, 2024

    What thickness rope did you use?

    Reply

Leave a ReplyCancel reply

This site uses Akismet to reduce spam. Learn how your comment data is processed.

Oh Hey, I’m Cat

  • DIY Reusable Chalkboard Gift Tags for Greener Gift Giving

  • DIY Beard Oil, Cedarwood + Black Pepper

  • DIY Gift Bag Tree Skirt (Hide Those Battery Packs!)

Featured Posts

  • Relaxing + Personalized $20 Gift Box IdeasRead More
  • DIY Evergreen Hair Combs for Pinterest Party HairRead More
  • DIY Necklace Display For Less Than $5Read More
  • Holiday Makeover | DIY Velvet Ribbon MulesRead More
  • A 2 Minute Ikebana Evergreen CenterpieceRead More
Etsy AAPI Favorite

Partner

Soltech Solutions Coupon CURATE2022
follow along on
instagram
Look twice; it’s no split image, it’s my one of my Look twice; it’s no split image, it’s my one of my favorite parts from the  #haileyhome condo. There Michael had his desk shoved in the corner of our small bedroom. As much as I wanted a light and airy feel, the desk always felt unintentionally “floaty”. With just paint and shelves, his desk went from an afterthought to a defined workspace with it’s own voice that felt distinct yet still a part of the room.

In our current house, I’m looking back at this project since next on my list will be Michael’s office! Michael inspired me with his 5 year anniversary gift to me (a nice furniture piece- he definitely knows me ☺️) so my gift to him will be wood shelves for his new office, plus a little space makeover. 

Excited to take on a small project while the kitchen reno is underway. It’ll feel nice to feel project progress somewhere and get hands on for the first time since Cade arrived ☺️
I set up a baby studio for Cade’s “month by month” I set up a baby studio for Cade’s “month by month” shots and there’s no way I’m taking it down for the rest of the year 😅 

It’s worth the space it takes up though. Capturing his growth and personality feels like the greatest privilege. I can’t believe there were only 3 weeks between his newborn and 1 month photos 🥲
Room is ready. Just waiting on baby boy to make hi Room is ready. Just waiting on baby boy to make his appearance. 

I’ll take any and all inducing tips 😅
#ad #cricutmade #cricutbright360 I’ve been auditi #ad #cricutmade #cricutbright360 
I’ve been auditioning different rooms around the new house for my studio space. Some have great storage, some have better natural light, but NONE have over headlight lighting. I didn’t think much of it until I tried crafting after work and realized, dang, I really can’t see anything 😅. I tried to make it work with different table lamps, photography lighting, even grow lights (spoiler: do not attempt unless you like being blinded). It wasn’t great. I figured I’d eventually get a proper crafting light, but wasn’t thrilled with the limited, and frankly ugly, options. 

I bet you picked up on this from the photo, but I finally found THE solution. @cricut just released their Cricut Bright 360 task lamps and it’s everything I could have ever dreamed of! I’ve been putting this lamp through its paces for a few weeks with nesting DIYs and will have a full review on the blog soon!

Copyright © 2026 · Genesis Framework · WordPress · Log in

  • About
  • Contact
  • Partnerships
Modern DIYS for a thoughtfully curated life
CTRL + Curate 2020 / Code by MTT
Modern DIYS for a
thoughtfully curated life
ctrl + curate 2020 / Code by MTT